Integrations
Overview
Integrations enable your organisation to integrate business processes into Apporetum. They enable automation and empower your bespoke needs to be met. Currently, Apporetum supports a range of activities around retrieving Application information, managing user access and managing CSV Applications.
Typical use cases include integrating ITSM systems (like Service Now or Jira) to add users via Apporetum. In this way, these systems offload the governance of access to Apporetum whilst also ensuring that all bespoke workflows are complete before access is granted.
Integrations directly communicate with your Apporetum's Instance via an external REST API. The external has an Open API Specification available on your API. Integrations authenticate via Entra ID (formerly Azure Active Directory) mechanisms to maximise the security and auditing of these systems.
Managing External Integrations
Before you begin
Before you can add an Integration you must create the necessary Entra ID (formerly Azure Active Directory) App Registration in Azure. This is what your software will use to authenticate to Entra ID (formerly Azure Active Directory) and will own the permissions to call Apporetum's API. Any Entra ID (formerly Azure Active Directory)min with Application Administrator can create an App Registration in the Azure Portal or via software like Powershell. Apporetum only requires that this app registration is created and will apply for the necessary permissions upon completion of the Registration in Apporetum.
You will need to create and securely store your App Registration's Client Secret or Client Certificate. We highly recommend you read this article on secure storage in Azure.
Navigate to Integrations
- Click the Settings main menu option
- By default, you will be seeing the System Info
- Click Integrations under the Connectivity tab
- Click the setting icon next to each row to update the current integration settings
- Click + Add Integration at the top right of the page to create a new one
Configure Integrations
About

- Display name is a friendly name that will be displayed in the integrations
- Description is used to describe important information about the integration. e.g. where does the software sit within your organisation, who manages the integration etc.
Authentication
Two sections below: Create a new integration setting; Modify a current integration setting
Create
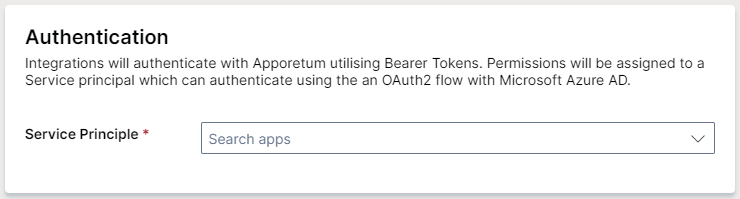
- This will show a search box that will search for the App Registration in Entra ID (formerly Azure Active Directory) portal. Select the one which was created for the integration
Modify
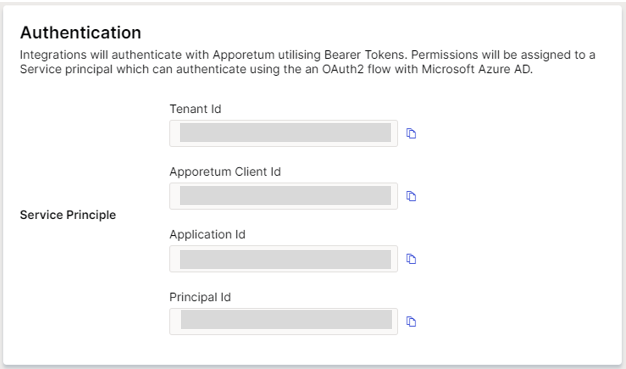
- When the form is in the modified view this will display important information about the Entra ID (formerly Azure Active Directory) App Registration.
- Tenant ID - This is the ID of the Entra ID (formerly Azure Active Directory) Tenant which owns the application
- Apporetum Client ID - This is the Client ID of your Apporetum Instance. Use this when negotiating a token with Entra ID (formerly Azure Active Directory) Sign In to gain the correct scope to your Apporetum API. E.g. HTTP Get
https://login.microsoftonline.com/{{Tenant_ID}}/oauth2/v2.0/token|| scope =api://{Apporetum_Client_ID}. Learn More
- Application ID - This is the Application (Client) ID of the Entra ID (formerly Azure Active Directory) Application
- Principal ID - This is the Service Principal ID of the Entra ID (formerly Azure Active Directory) Application
Permissions
Control what actions this Integration can do at a global level or entity level. There are four actions available to both global and entity levels. When you set up at the global level, you have the option to select one or more actions. While at the entity level, you will have all four actions applying to the app or/and data source that you select.
Depending on your needs and the situations, you can choose to set up global permissions, entity level permissions or both.
If you have selected both global and entity level permissions, those permissions will cumulatively apply to the integration. An example is provided below.
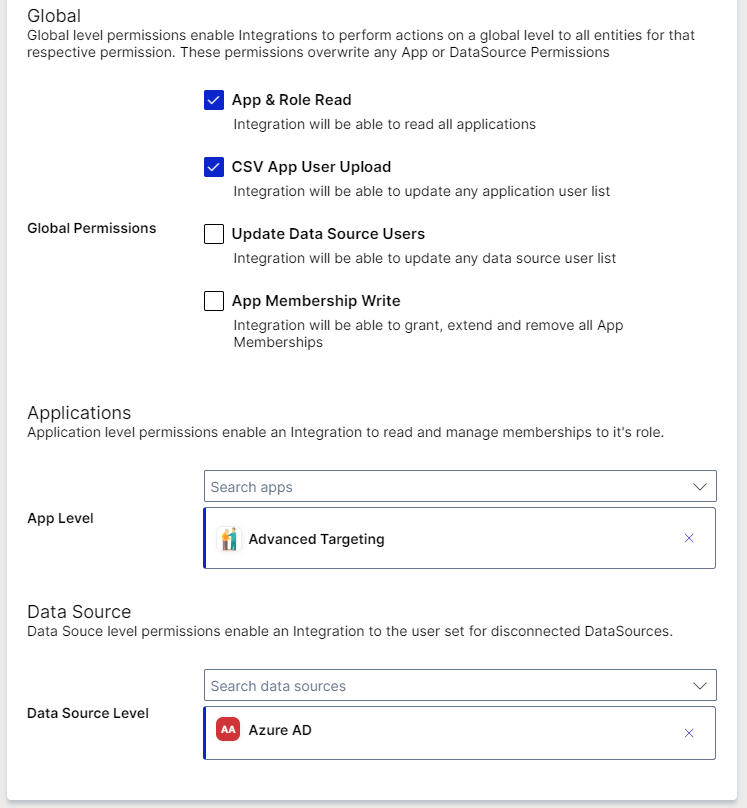
Example
Step 1: Global Permissions
- App & Role Read and CSV App User Upload are selected
- As a result, those two selected actions will be applied to all apps and data sources at the global level.
Step 2: Entity Permissions
-
App Level
- The app Advanced Targeting is selected
- As a result, App & Role Read, CSV App User Upload, Update Data Source Users, and App Membership Write actions will all apply to this app, Advanced Targeting
-
Data Source Level
- Entra ID (formerly Azure Active Directory) is selected
- As a result, App & Role Read, CSV App User Upload, Update Data Source Users, and App Membership Write actions will all apply to this data source, Entra ID (formerly Azure Active Directory)
Global Permissions
You can choose from the four actions available here. Once you select them, all apps will have those actions as permissions. However, if you want to have all four actions applying to specific apps or data sources, you should continue to set up entity level permission settings.
We recommend you avoid the use of global permissions where possible. This will allow you to maintain the least privilege for your integration and optimise security.
Categories
- App & Role Read
- Enables your Integration to read ALL Applications and their associated roles
- CSV App User Upload
- Enables your Integration to upload a Members list to any CSV Application
- Update Data Source Users
- Enables your Integration to upload a User List to any CSV Data Source
- App Membership Write
- Enables your Integration to Grant, Extend, Renew and Delete any App Membership in Apporetum
Entity Level Permissions
Setting permissions up at the entity level will allow specific apps or data sources to have all four actions as permissions.
We highly recommend that you use these permissions over global permissions to maximise security.
Application Level
Search and select the Apporetum applications which you want to have all four actions applied.
Data Source Level
Search and select the Apporetum data sources which you want to have all four actions applied.